Getting Started with Measurement Studio Installer Builder
Overview
Contents
- Underlying Technology
- Creating an Installer Using the Installer Project Wizard
- Configuring Options Within Measurement Studio Installer Builder
- Using Advanced Features
- Building and Deploying Your Application
Underlying Technology
Measurement Studio Installer Builder is built on Microsoft Windows Installer (.msi) distribution technology, which provides a familiar install-time user interface and ensures proper run-time behavior on the target machine. Windows Installer technology packages all built libraries and executables along with any additional necessary files and registry keys into a single installer. It is a base service of the Windows OS . By providing a standard framework to support versioning information, it gives you the ability to properly handle the installation state of your application. This helps enforce correct behavior when performing installations, reinstallations, repairs, or upgrades.
Creating an Installer Using the Installer Project Wizard
Open Measurement Studio Installer Builder directly from within Visual Studio or access it through the Measurement Studio Shared folder by navigating to Start Menu»All Programs»National Instruments»Measurement Studio Shared.
Select New Installer Project from the start screen to launch the Installer Project Wizard, which guides you through four steps to create a simple installer.
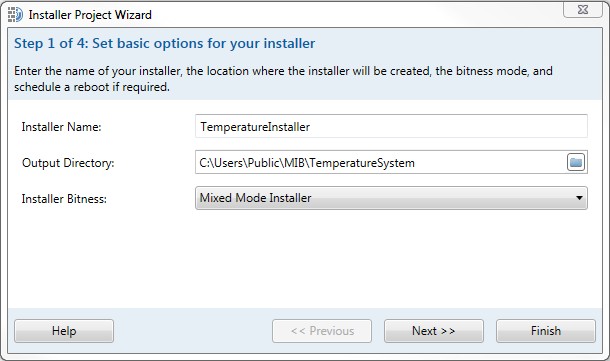
Set basic options for your installer by first selecting the name for your installer project. This value determines the default application directory and the product name for the Add/Remove Programs utility on the target machine. In this first configuration window, you can also specify bitness to match the bitness of the application that you are deploying. Use the Mixed Mode Installer to create an installer to run on both 32- and 64-bit OSs. With this option, you can install registry keys and files to either 32- or 64-bit locations. In the Installer Project Wizard , you can also specify the application directory root and add application-related files and NI installers such as any runtime required for your application.
Configuring Options Within Measurement Studio Installer Builder
After you have created a simple installer using the Installer Project Wizard, you can make further configurations from within the wizard. Configure more options on the Installer Options tab of the main Installer Builder UI.
Basic Options
Within the Basic Options tab, you can edit the installer name, output directory, and installer bitness as well as set a media size to allow the installer to fit on distribution media. You can also select the option to require a reboot after installation.
Installer Dialog Options
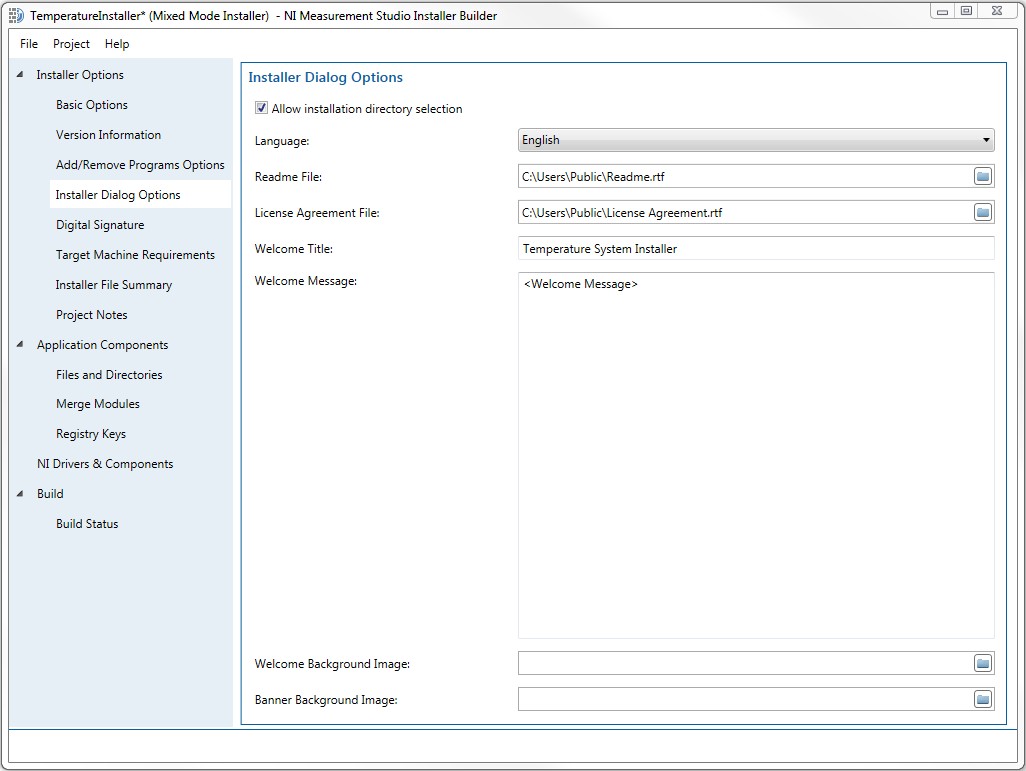
In the Installer Dialog Options tab, customize the look of the installer dialog and add components such as a readme file or license agreement file.
- Readme File: Use this field to provide the file path to the readme file for the application. Alternately, you can use the browse button to navigate to the file location. This readme file appears to the user during installation.
- License Agreement File: Use this field to provide the file path to the license agreements to include in your installer. During installation, the license agreement dialog box prompts the user to accept in order to continue installing the application.
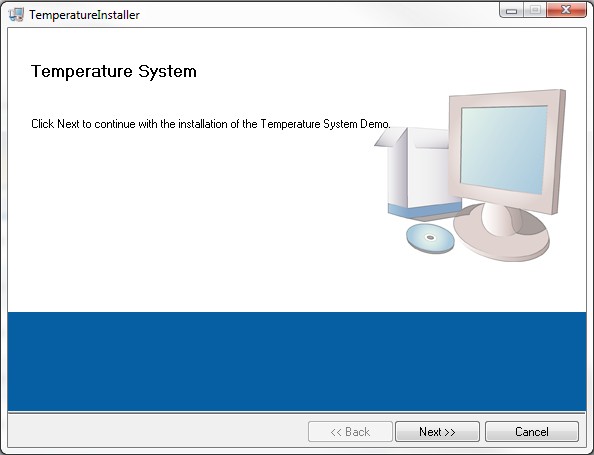
- Welcome Title: Set the title you want to use for your application in the welcome screen of the installer.
- Welcome Message: Include additional information in the installer welcome screen. For example, add information about your application, system requirements, or copyrights.
- Welcome Background Image: Set a specified background image for the welcome screen for your application’s installer.
- Banner Background Image: Select a personalized background image for the banner of your application’s installer. This banner appears behind the title for the installer dialog boxes. The default is pictured below.
Files and Directories
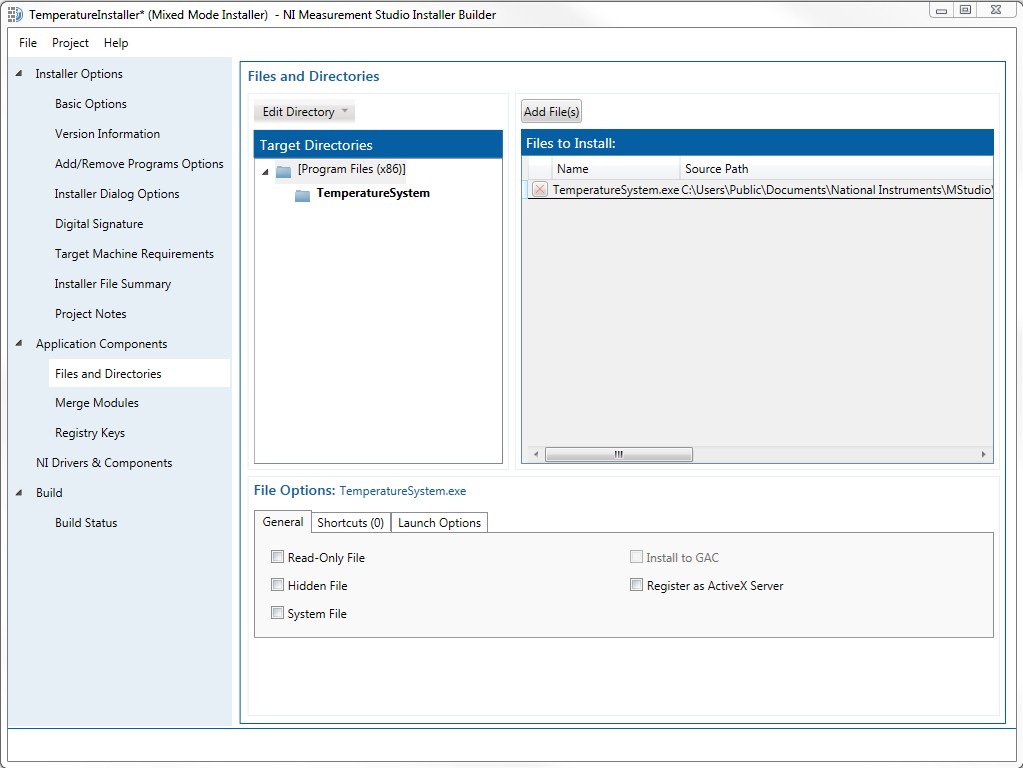
From the Files and Directories tab, select the files you want to include in the installer and specify the target directories to which your files will be installed. The Files to Install pane displays the files that are set to install to the selected directory in the Target Directories tree. Add your startup application to the Application Directory, which is bolded in the Target Directories pane and can be edited with the Edit Directory drop-down menu. Also include any dependent assemblies in the Application Directory if you are not using NI installers to install dependencies. After you have added files to the installer, you can view the name, source path, and target path in the Files to Install pane, and you can also use the delete button to remove any unwanted files from the list. Add shortcuts for the application with the Shortcuts tab. Create a shortcut by selecting Add Shortcut.
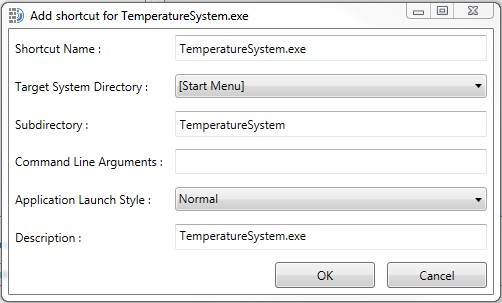
Choose the directory into which you would like to install the shortcut. The default value is [Start Menu], but you can choose other directories such as [Desktop] for ease of use. You can specify the subdirectory of the selected directory into which you would like to install the shortcut. To install directly to the directory, leave this field blank.
In the Launch Options tab, select a file in the Files to Install window to automatically launch an application after installation is complete or to automatically launch an application before the application is uninstalled. You can specify the launch style and optionally add command line arguments.
Merge Modules
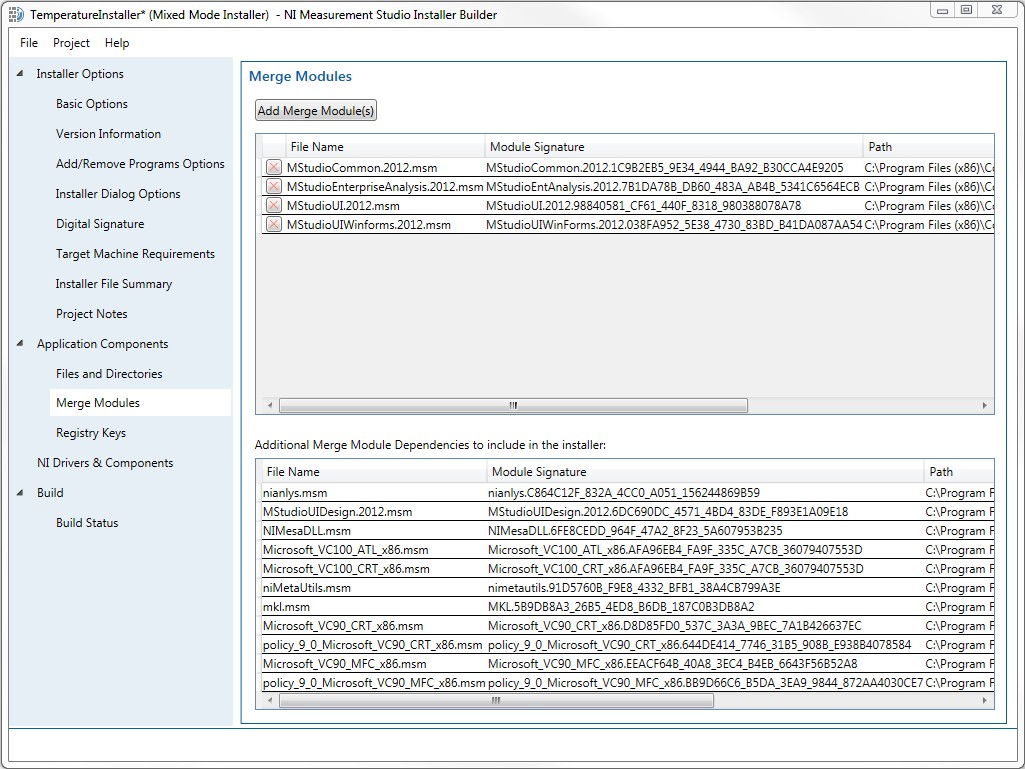
A merge module (.msm) contains installer components and setup logic to be merged into a .msi installer. A merge module is similar to a .msi, except that a merge module cannot be installed independently. You can find which merge modules are required for each assembly being used by the application in the Measurement Studio help. The second pane, Additional Merge Module Dependencies to include in the installer, gives you the ability to verify what dependencies are going to be added to the installer when it is built. It is recommended you use NI runtime installers to distribute NI components of your application. You can use merge modules to distribute components that do not provide a runtime installer.
NI Drivers and Components
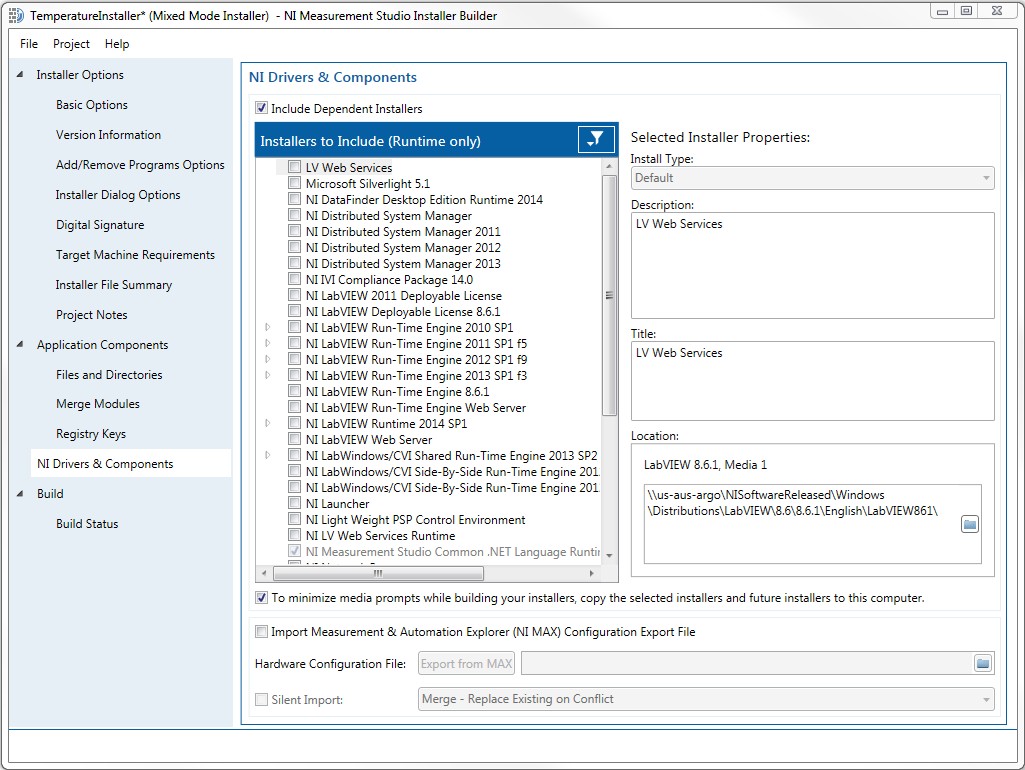
Use the NI Drivers & Components tab to manually include installers for any NI drivers or runtimes required by your application. There is also an option to Include Dependent Installers that will have the installer builder automatically detect the NI dependencies for the application you are distributing and includes installers for those NI components.
There is also an option you can use to import a Measurement & Automation Explorer (MAX) configuration export file into your installer. Including this file means that settings from previously configured hardware will be included in your installer. Use this feature if the hardware configuration on the target system is known and fixed.
Using Advanced Features
The Measurement Studio Installer Builder also offers advanced features to further customize the installer’s function to suit your application’s requirements. Each feature has its own tab in the installer builder.
- Version Information: Specify the installer version number, set the auto-increment behavior for your build version number, and verify the upgrade code. The installer builder uses major.minor.build version numbers.
- Add/Remove Programs Options: Set the product name, the name of the publisher, the URL for any documentation you install, contact information, and a URL or phone number for technical support.
- Digital Signature: Include a digital certificate or a URL with the timestamp or description of the installer.
- Target Machine Requirements: Set conditions for your installer so that it does not install if the OS detected is not supported. In this case, end users get an error message and the installation fails.
- Installer File Summary: Create a summary for the installer file, including fields for title, subject, keywords, author, and comments. These properties appear in the Details tab in the properties dialog box for the ..\Volume\bin\dp\MyInstaller.msi
- Project Notes: Include any notes or instructions in your installer builder file. This tab includes information for the installer author only.
- Registry Keys: Use the Registry Keys tree to configure registry keys to install to a target machine.
Building and Deploying Your Application
Build the installer by going to the Build Status tab and clicking Build. When prompted to save your .iip file, save it in the directory you specified as your output directory. The build output shows information about the current installer build, including successes and error messages. After the build finishes, Explore Output Directory navigates to the directory containing the volume for the installer
The build output directory consists of several folders named Volume through Volume<n>, each represents physical media of the size specified in the Basic Options tab. To package the build output for installation on target machines, copy each Volume folder to the physical media you are using to distribute your installer. Then open the media with the primary Volume folder on the target machine and run setup.exe to install your application.