Enabling Teamwork with NI ELVIS III
Overview
Contents
- Connecting to a Network with NI ELVIS III
- Collaborating on Instrumentation
- Collaborating in LabVIEW
- Applications of Collaboration with NI ELVIS III
- Next Steps
Connecting to a Network with NI ELVIS III
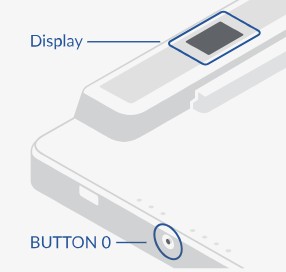
The first step to engaging multiple students on a lab or project is to get them connected to their NI ELVIS III. The options for connecting include WiFi or Ethernet. Once the NI ELVIS is connected to a network, a student can navigate to measurementslive.ni.com to begin using the instruments. Simply look at the display for the pairing code as shown below and any student on the network can connect to the NI ELVIS III simultaneously.
Figure 1: Displaying network information
- For more information about connecting NI ELVIS III to a network via ethernet, visit the NI ELVIS III product manual.
- For more information about connecting NI ELVIS III to a network via WiFi, visit the NI ELVIS III product manual.
One note about accessing the NI ELVIS III, you must be on the same subnet as the NI ELVIS to use the ID and connect via MeasurementsLive. That means you need to be on the same network, either connected to the identical network yourself or connected through a VPN. If you are unable to be on the same network but still want to use the NI ELVIS III remotely, you may be able to connect by typing in the IP address of the NI ELVIS III (also located on the display) if your ports are being forwarded. See this external document for more information on port forwarding.
Collaborating on Instrumentation
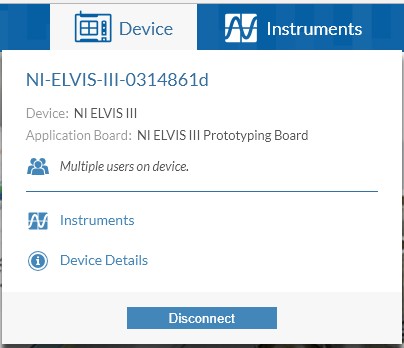
With NI ELVIS III, getting two or more students working together on a lab is simple. With the device connected to a network, each student will need to connect in MeasurementsLive by going to measurementslive.ni.com and entering in the ID found at the top of the NI ELVIS:
Figure 2: Multiple users connecting to NI ELVIS III
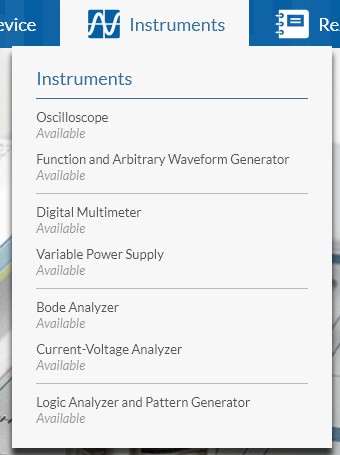
Once connected, each student can launch instruments on his or her own computers by clicking on the Instruments tab and choosing an instrument that is not currently in use.
Figure 3: List of instruments available
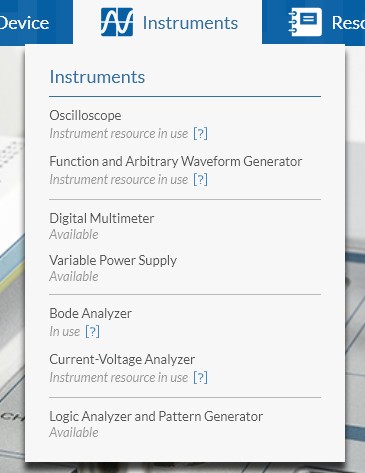
An instrument is registered “in use” when it is being run or the resource is accessed via another instrument. For example, the bode analyzer automatically sources a swept function and reads that back in on the oscilloscope which, when running, will show the oscilloscope, function generator, and bode analyzer as in use.
Figure 4: Instrument resources in use
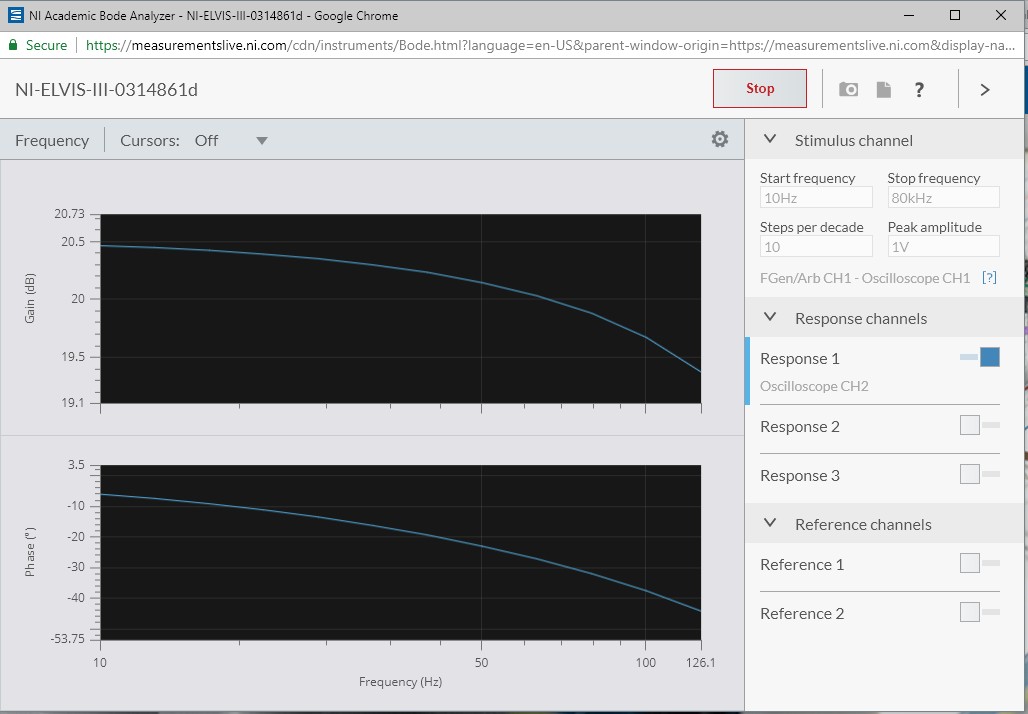
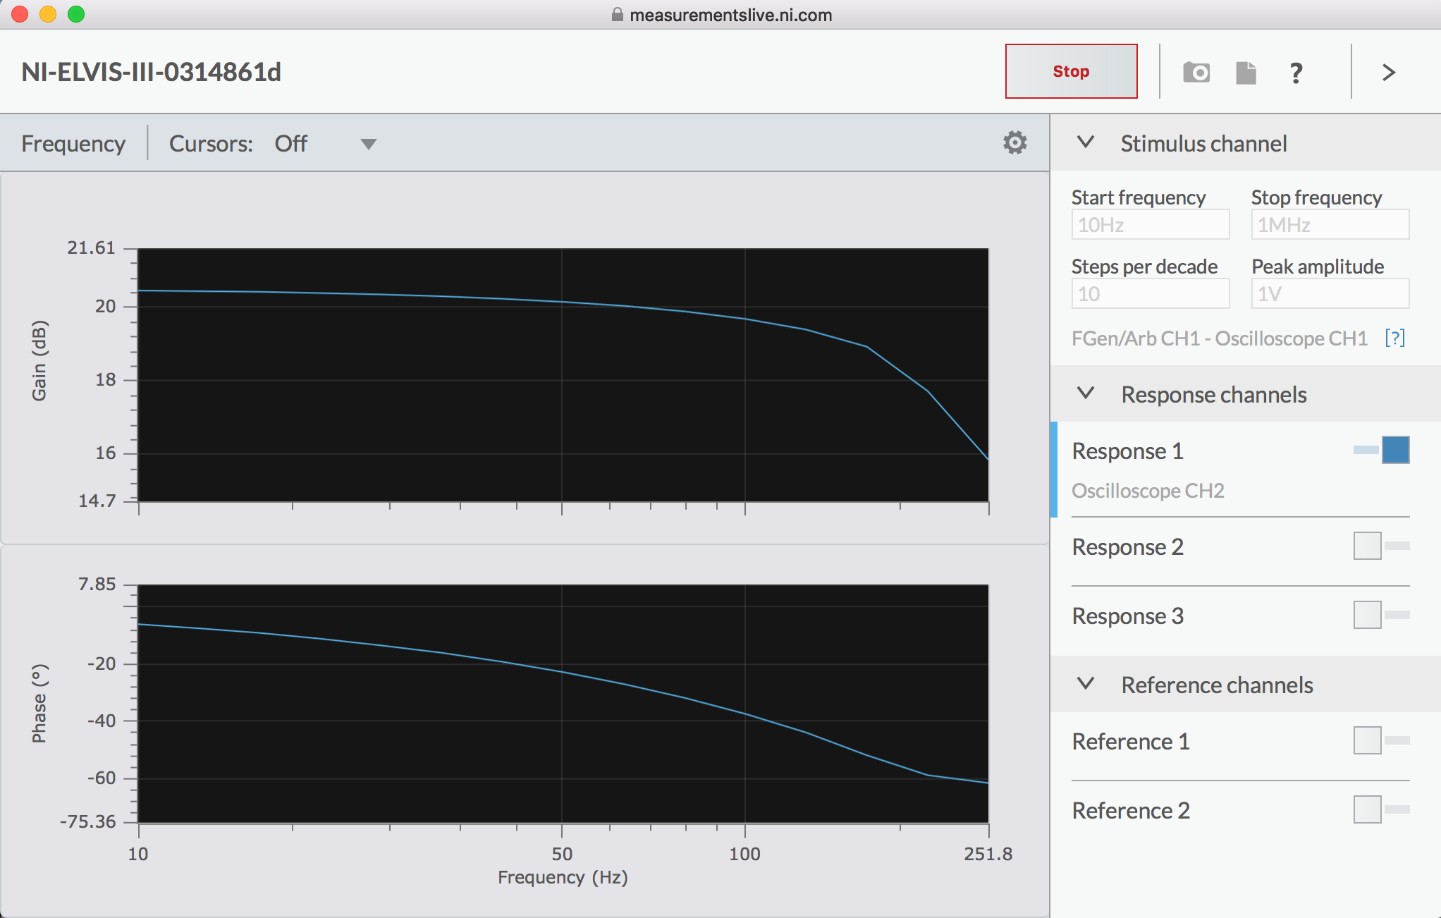
You may notice that some instruments allow you to open them even when they are in use. Those instruments are the bode analyzer and the current-voltage Analyzer. The reason being these are currently web-based instruments. With our web-based instruments, each student can open the instrument on their own computer and view the results as the data is being acquired
Figure 5: Bode analyzer running on Windows computer
Figure 6: Same Bode Analysis as Figure 5 running on Mac.
- Need more information on the capabilities of the NI ELVIS III Instruments? Explore all of them through a series of short how-to videos.
Collaborating in LabVIEW
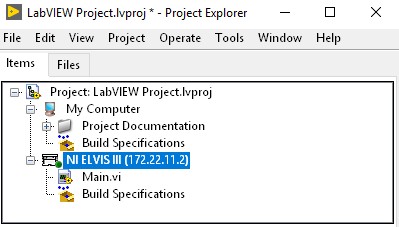
Beyond the instrumentation, NI ELVIS III has 16 analog inputs, 4 analog outputs, and 40 digital inputs and outputs each of which can be programmed in LabVIEW, C, or Python. While only one user and one program can be connected to an NI ELVIS III at a time in a LabVIEW project, there are a couple of tricks we can implement to enable multiple computers to control a LabVIEW project running on an NI ELVIS III.
Figure 7: LabVIEW project for NI ELVIS III
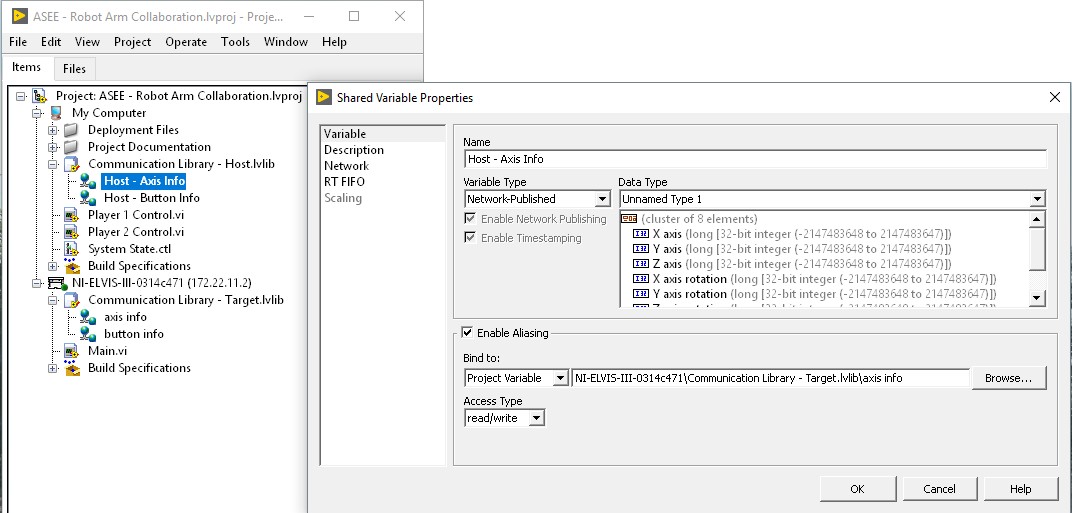
Network-Shared Variables in LabVIEW are the best method of enabling multi-user control over a LabVIEW VI running on an NI ELVIS III. These are variables that are set and read over a network connection. This means the NI ELVIS III is hosting a variable that is modifiable over the network by any computer that has the correct variable name.
Figure 8: Network shared variable configuration for NI ELVIS III
- For more information about shared variables, visit the Shared Variable Whitepaper.
- For more information on programming NI ELVIS III in LabVIEW, visit the tutorial.
Applications of Collaboration with NI ELVIS III
Multidisciplinary Projects
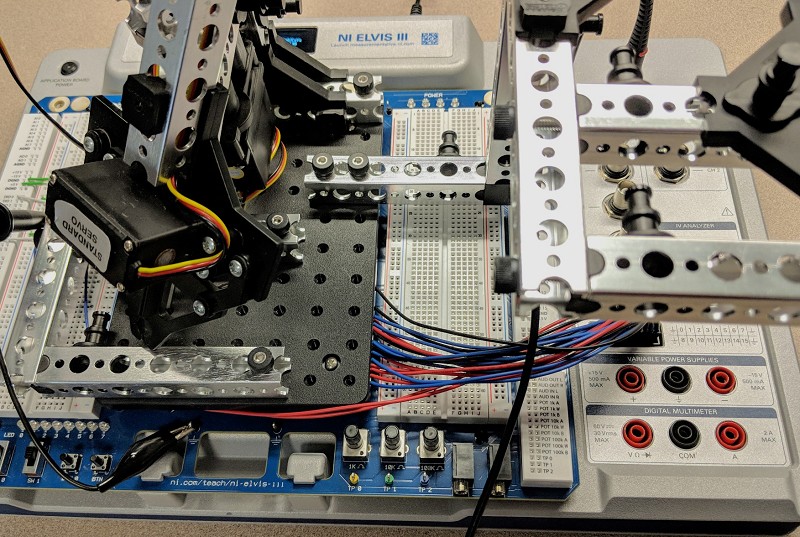
Using an NI ELVIS III, students with different backgrounds working together on a shared project can be more effective and make best use of their time. In a scenario where a controls engineer is partnered with an electrical engineer, the electrical engineer can make use of the instrumentation to troubleshoot the circuitry while the controls engineer develops the PID algorithm in LabVIEW. Giving students the power to choose their own tasks and collaborate simultaneously opens up the possibilities for more advanced projects and to potentially accomplish more within the short period of lab time.
Figure 9: Robot arm built on NI ELVIS III
Remote Lab Grading
Another example of using NI ELVIS III remotely is when a teaching assistant or instructor needs to grade or check a student’s work before allowing that student to continue to the next part of the lab. The traditional method of doing this would be to have a teaching assistant constantly patrolling the lab waiting for a student’s hand to go up to check the lab. However, with NI ELVIS III, a student can send the teaching assistant a message with the NI ELVIS III’s network ID and the teaching assistant can go in and ensure that the circuit is performing as expected. Similarly, given a program created in LabVIEW, the teaching assistant can connect via the LabVIEW Project remotely to ensure the student has met the desired lab outcome.
Distance Learning
Finally, a format of learning becoming more popular as students turn towards MOOCs and other online learning formats, distance learning is greatly enhanced when combined with NI ELVIS III. Using Application Boards for NI ELVIS III, students can log in remotely and complete labs all without the need to be physically next to the hardware. While this does limit the labs only to those which do not require physical configuration, a number of universities world-wide have already been very successful using NI hardware remotely.
Next Steps
- For more information about connecting NI ELVIS III to a network via WiFi or Ethernet, visit the NI ELVIS III product manual.
- Explore all of them through a series of short how-to videos.
- For more information about shared variables, visit the Shared Variable Whitepaper.
- For more information on programming NI ELVIS III in LabVIEW, visit the tutorial.
